“Elevate Your Travel Photography: Mastering Mobile Composition and Settings
Related Articles Elevate Your Travel Photography: Mastering Mobile Composition and Settings
- Cinematic Travel: Capturing The World Through The Best Lenses
- Lightweight Lenses And Travel Editing Apps: A Photographer’s Perfect Pairing
- Unleashing The Magic: Mastering Hidden Travel Time-Lapse Settings
- Cinematic Vlogging On The Go: A Beginner’s Guide To Capturing Stunning Travel Content
- Capturing The World In Stunning Detail: 4K Travel Photo Tips And Accessories
Introduction
Today, we’re excited to unravel an engaging topic: Elevate Your Travel Photography: Mastering Mobile Composition and Settings. Join us as we navigate insights that inform, inspire, and open new perspectives for our readers.
Table of Content
Elevate Your Travel Photography: Mastering Mobile Composition and Settings

In the age of smartphones, capturing breathtaking travel moments has never been more accessible. The compact size and powerful capabilities of mobile devices have transformed everyone into potential travel photographers. However, simply pointing and shooting rarely yields truly compelling images. To elevate your travel photography, understanding the fundamentals of composition and mastering your smartphone’s camera settings are essential. This article delves into the art of mobile photo composition, explores the optimal settings for various travel scenarios, and provides practical tips to help you create unforgettable visual stories of your adventures.
I. The Art of Mobile Photo Composition
Composition is the arrangement of visual elements within a frame. It’s the backbone of a compelling photograph, guiding the viewer’s eye and conveying the photographer’s intent. While rules exist, remember that they are guidelines, not rigid constraints. Experimentation and personal style are key.
-
The Rule of Thirds:
- Concept: Divide your frame into nine equal rectangles using two horizontal and two vertical lines. Place key elements along these lines or at their intersections.
- Application: When photographing a landscape, position the horizon line along the top or bottom third to emphasize the sky or foreground. In portraits, place the subject’s eyes at an intersection point for impactful engagement.
- Why it Works: Creates balance and visual interest, preventing the subject from being centered and static.
-
Leading Lines:
- Concept: Use lines – roads, rivers, fences, architectural elements – to draw the viewer’s eye into the scene.
- Application: In cityscapes, use a street or bridge as a leading line to guide the viewer towards a prominent building. In nature, a winding path can lead to a distant mountain.
- Why it Works: Creates depth, perspective, and a sense of journey, inviting the viewer to explore the photograph.
-
Framing:
- Concept: Use elements within the scene to create a frame around your subject, adding depth and context.
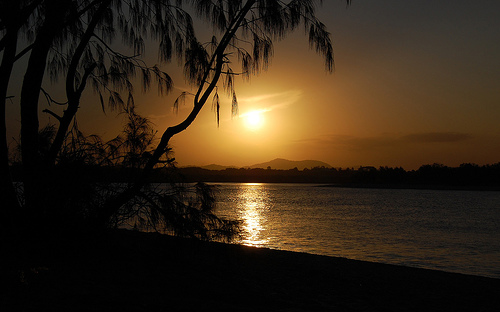
- Application: Shoot through an archway to frame a distant landmark, use tree branches to frame a sunset, or position your subject within a doorway.
- Why it Works: Isolates the subject, draws attention to it, and adds layers of visual interest.
-
Symmetry and Patterns:
- Concept: Embrace symmetry and repeating patterns to create visually appealing and balanced compositions.
- Application: Photograph reflections in water, capture the symmetry of a building facade, or highlight repeating patterns in nature (e.g., rows of trees, waves on a beach).
- Why it Works: Symmetry provides a sense of order and harmony, while patterns create visual rhythm and intrigue.
-
Negative Space:
- Concept: Deliberately leave empty space around your subject to create a sense of calm, isolation, or scale.
- Application: Photograph a lone figure against a vast sky, a small boat on a wide expanse of water, or a single tree in a field of snow.
- Why it Works: Emphasizes the subject, creates visual breathing room, and evokes a sense of solitude or grandeur.
-
Point of View:
- Concept: Experiment with different angles and perspectives to create unique and compelling compositions.
- Application: Shoot from a low angle to make your subject appear larger and more imposing, from a high angle to capture a wider scene, or from an unusual perspective to create a sense of surprise.
- Why it Works: Offers a fresh take on familiar subjects, adding dynamism and visual interest.
-
Color:
- Concept: Use color to enhance your composition and evoke emotions.
- Application: Look for complementary colors (e.g., blue and orange) to create contrast, use analogous colors (e.g., blue, green, and teal) to create harmony, or focus on a single dominant color to create a sense of unity.
- Why it Works: Color plays a powerful role in visual storytelling, influencing mood and attracting the viewer’s attention.
II. Mastering Mobile Camera Settings for Travel
Modern smartphones offer a surprising degree of control over camera settings. Understanding these settings allows you to adapt to different lighting conditions and capture the best possible image quality.
-
Resolution:
- Setting: Typically found in camera settings.
- Recommendation: Shoot at the highest resolution your phone allows. This provides the most detail and flexibility for editing and printing.
-
Focus and Exposure:
- Setting: Tap on the screen to focus on a specific area. Some phones allow you to adjust exposure by sliding your finger up or down after focusing.
- Recommendation: Use manual focus when the autofocus struggles (e.g., in low light or when shooting through glass). Adjust exposure to brighten or darken the image as needed.
-
HDR (High Dynamic Range):
- Setting: Often an on/off toggle in the camera app.
- Recommendation: Use HDR in scenes with high contrast (e.g., bright sky and dark foreground). HDR combines multiple exposures to capture detail in both the highlights and shadows.
-
ISO:
- Setting: Found in Pro or Manual mode.
- Recommendation: Keep ISO as low as possible (typically ISO 100) to minimize noise. Increase ISO only when necessary in low light, but be aware that higher ISOs will result in more noise.
-
White Balance:
- Setting: Found in Pro or Manual mode.
- Recommendation: Use the appropriate white balance setting for the lighting conditions (e.g., Daylight, Cloudy, Fluorescent, Incandescent). Auto white balance often works well, but manual adjustments can improve color accuracy.
-
Shutter Speed:
- Setting: Found in Pro or Manual mode.
- Recommendation: Use a faster shutter speed to freeze motion (e.g., when photographing wildlife or sports). Use a slower shutter speed to create motion blur (e.g., when photographing waterfalls or moving vehicles). Note: Slower shutter speeds require a tripod or stable surface to avoid camera shake.
-
Aperture:
- Setting: Some high-end smartphones offer adjustable aperture, allowing you to control depth of field.
- Recommendation: Use a wider aperture (lower f-number) to create a shallow depth of field, blurring the background and emphasizing the subject. Use a narrower aperture (higher f-number) to create a greater depth of field, keeping both the foreground and background in focus.
-
Shooting Modes:
- Setting: Different modes available in the camera app (e.g., Portrait, Night, Panorama, Time-Lapse).
- Recommendation: Explore different shooting modes to optimize your camera for specific scenarios. Portrait mode creates a shallow depth of field for portraits, Night mode improves low-light performance, Panorama mode captures wide landscapes, and Time-Lapse mode creates sped-up videos.
-
RAW vs. JPEG:
- Setting: Found in camera settings.
- Recommendation: Shoot in RAW format for maximum editing flexibility. RAW files contain more data than JPEGs, allowing for greater adjustments to exposure, white balance, and color without sacrificing image quality. Note: RAW files are larger than JPEGs and require editing software.
III. Travel Settings and Composition Tips
Here’s how to combine composition techniques and camera settings for specific travel scenarios:
-
Landscapes:
- Composition: Use the rule of thirds to position the horizon line. Incorporate leading lines to draw the viewer into the scene. Use framing to add depth and context.
- Settings: Use a narrow aperture (higher f-number) to maximize depth of field. Use HDR to capture detail in both the sky and foreground. Consider using a polarizing filter to reduce glare and enhance colors.
-
Cityscapes:
- Composition: Look for symmetry and patterns in architecture. Use leading lines to guide the viewer’s eye. Experiment with different angles and perspectives.
- Settings: Use a narrow aperture to maximize depth of field. Use HDR to capture detail in both the bright and shadowed areas. Consider shooting at night with a tripod to capture light trails.
-
Portraits:
- Composition: Use the rule of thirds to position the subject’s eyes. Use a shallow depth of field to blur the background and emphasize the subject. Pay attention to the background and avoid distracting elements.
- Settings: Use Portrait mode to create a shallow depth of field. Adjust exposure to properly light the subject’s face. Use a reflector to bounce light onto the subject’s face and reduce shadows.
-
Street Photography:
- Composition: Look for interesting moments and interactions. Use leading lines to draw the viewer into the scene. Capture candid shots of people in their environment.
- Settings: Use a fast shutter speed to freeze motion. Use a wide aperture to create a shallow depth of field and isolate the subject. Be discreet and respectful of your subjects.
-
Night Photography:
- Composition: Look for interesting light sources and reflections. Use leading lines to guide the viewer’s eye. Capture long exposures to create light trails.
- Settings: Use a tripod to stabilize your phone. Use a slow shutter speed to capture more light. Use a low ISO to minimize noise. Experiment with different white balance settings to achieve the desired color temperature.
IV. Post-Processing: Enhancing Your Mobile Photos
Editing is an integral part of the photography process. Mobile editing apps like Snapseed, Lightroom Mobile, and VSCO offer powerful tools to enhance your images.
-
Basic Adjustments:
- Exposure: Adjust brightness and contrast.
- Highlights and Shadows: Recover detail in bright and dark areas.
- White Balance: Correct color casts.
- Clarity and Sharpness: Enhance detail and texture.
-
Creative Adjustments:
- Filters: Apply pre-set looks to your images.
- Color Grading: Adjust individual colors to create a specific mood.
- Selective Adjustments: Make adjustments to specific areas of the image.
V. Final Thoughts
Mobile photography has democratized the art of visual storytelling. By mastering the fundamentals of composition and understanding your smartphone’s camera settings, you can capture stunning travel images that truly reflect the beauty and wonder of your adventures. Remember to experiment, be creative, and develop your own unique style. Happy shooting!


